Wednesday, 17 December 2008

Christmas Time


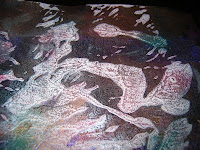
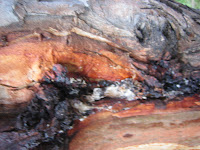
It is getting closer to Christmas and I am finding it even more difficult to get back into my craft activities after my holiday. I am working on the basis that once Christmas is over I will be able to focus better on what I want to do next. In the meantime here a some photos to help provide some inspiration

Wednesday, 3 December 2008

Time to get blogging again


I thought it was time to put an effort back into my blog. I have just spent five weeks in Paris and came back with lots of photos, although I was planning on following in the Breakfast in Paris blog and taking 5,000 I only managed 1,000. My husband thought I had gone mad when I started taking photos of manhole covers. According to a friend , Jean Littlejohn, finds lots of inspiration in their patterns. I myself was rather taken with the patisserie windows as inspiration -as much by the taste (of which in fact I had very little) as the actual colours and patterns.

Sunday, 27 April 2008

Dyeing on Line


I have had another creative splurge with dyeing and felting. I have been experimenting dyeing both fabric and wool tops in similar colours but using different types of dyes. I used Procion for the fabric and acid milling dyes for the wool tops. The wool tops didn''t turn out as dark as I would have liked and I think that is because it didn't get hot enough during the heating proces. Despite that I do like the colours. One is a lovely soft mottled pink with a slight green tinge while the other is green and yellow although the colours are not as muddied as the first length. The second and third pictures show the fabrics and after dyeing. The first and last pictures show the fabrics (the smaller pieces)after felting using the wool tops. The large piece of fabric is silk and I don't think I will felt that although what I will do with it I am not sure.

Saturday, 19 April 2008

Cards made from my papers


Following on from my last post I was asked what I do with the papers. I usually make gift cards that I decorate with a piece of a paper. I do this by looking at the larger papers and finding areas that are suggestive, in an abstract sort of way, of something for example, under the sea or in the night sky or just sections that I find interesting or appealing to me. Then cut this piece out and find a card or card stock and backing paper and make a card from this. Here is an example of a card I made from an paper I made a while back. It has a water colour and ink background that I then over printed several times with monoprints made from acrylic paints.

Thursday, 10 April 2008

Latest papers


I am finally over my virus and have gone beserk trying new ways to make papers. I looked back through my Cloth Paper Scissors and found an article by Ruth Issett in Issue No 10. The first three pictures are papers based on crumbling brown paperand painting it with lustres and metallic powders mixed with acrylic medium and then painting it with inks. Number four uses gel medium and lusters mixed together and painted on watercolour paper. It was then over stamped. Number fiveis something I made up using Ruth's idea of coloured gel medium on black paper but after drying I then sprayed it with Ink Refresher and painted it with pearl ex powder paste and sprayed that with water letting the colours run.

Monday, 7 April 2008

Chillis and tomatoes


Do you like chillis? Each year we grow a crop of chillis for using in cooking during the coming months. My husband turns them into mush adding salt and vinegar to perserve them. We also grow lots of tomatoes and coriander. They make a great photo I think. They must be inspiration for some future work.

ATC SWAP


I have finally started getting my act together after feeling rotten for the past several weeks and today was certainly a good start in the right direction when I received these two beautiful ATCs from Debbie Baker. I hope you enjoy looking at them as much as me.
I must apologise for the photo - my camera seems to be doing things I don't want it too and I don't know why. I took this picture the right way up but somehow the camera has a mind of its own and put them sideways. I changed them in the Picassa program but when I upload them to the blog they change back. Any clues why?

Before I became ill I had been making some ATCs (some textile and some paper arts) and was wondering if anyone would like to swap with me. I have about 10 textile and 10 paper arts ones so first in first served.

Sunday, 30 March 2008

Beaded motifs


I have been sick with some kind of flu or virus for the past week and have not been feeling up to doing any creative activity. I thought I would have a look back through pictures of some of the things I made in the past and came across these items. They are made using a large bead (of any size or shape) and beading around this in a free form manner. I use a needle threaded with nymo and a diffeerent stitches such as peyote, brick or just what I make up. I use a variety of smaller beads, different sizes, types or colours. Although I don't start with any particular design in mind, I do like looking at undersea photography of coral and other creatures and these two remind me of that.

Monday, 24 March 2008

Happiness


My grandaughter Louise was married on Easter Saturday. She is a truly lovely young woman and Sam is a very lucky man. I know she is equally lucky to have Sam in her life. They have our love and best wishes for a fortunate life together.

Tuesday, 18 March 2008

My watercolour papers


These three pictures show my own ideas of making papers. These were done by using a piece of watercolour paper. I put a water colour wash across the surface using three colours, yellow, green and purple. While it was wet I sprinkled some rock salt across the surface. While it was still wet I splashed dollops of very wet paint in the colours already used. I then let it dry and removed the salt, then stamped it and sprinkled embossing powder across the stamp and heated it with the heat gun. Finally, I put a very light and wet wash in carmine red across the surface. I really like the finished item

Wonder Under, Bondaweb, Vsieflix - Painted Paper


What do you do with the paper off the back of your Bondaweb after you have painted it and used in some really creative manner. I had piles of paper I saved all of which had paint left on it. I decided to try to make use of this and here are the results. The first picture shows the paper after I added a nappy liner coloured with Shiva Sticks and then heated so it adhered to the paper. I then stamped it and sprinkled embossing powder and heated it again. The second picture shows a pile of paper beads made from the Bondaweb paper with some embossing (done as described above) on the outside .
I am now going to give some further thought to how else this paper can be used

Paper Transformed 2


This is a photo of the artwork I made in accordance with the directions for Wax Paper Batik described in Julia Andrus's book on page 81. I really like the effect and am going to experiment more to see what I can add to this.

Paper Transformed


I recently purchased Julia Andrus's book "Paper Transformed" and have been experimenting with some of the techniques in the book. These two pictures show the technique listed on page 54. The first photo shows the technique exactly as described. Photo two shows the results after I added an acrylic paint monoprint and then rubbed Treasure Gold over the surface.

Friday, 14 March 2008

Migrants and craft in Australia

A couple of weeks back I found out that the Migrant Resource Centre in Canberra was looking for people who can help migrants to Australia to learn to speak english. I have been thinking for a while that I would like to do some volunteer work so I decided that I would go along. I have been for the last three Friday mornings and really enjoyed myself. At the moment it is not a large group but it is quite diverse. There are women from Russia, The Philippines, Brazil, Sweden, China, Poland and Macedonia.

The idea behind the group is for the women to undertake craft type activities and in the process help improve their english language skills. I really enjoy it because I am learning about the world of migrant women in Australia and all the difficulties they face adjusting to a new life. Australia is so far away from almost everywhere in the world and I can already see how hard it is for them away from their families.

From my personal point of view I am also enjoying hearing about life in other countries. I will talk more about this as I learn more. So far I have been teaching beading using a needle and thread to some of the women. Others are learning knitting and crocheting. The leader of the group, Diana, brings along all kinds of materials, wool, beads, embroidery materials and the women have a choice about what they would like to do. She also makes a beautiful morning tea, Today we had advocado dip on sour dough bread, fresh nashi pears and grapes. A veritable feast.

I feel that this is a really worthwhile activity and look forward to seeing what else I can do to help our new citizens and what I can learn from them .

Wednesday, 12 March 2008


I have been doing some dyeing with the cramb jar method (described in an earlier blog of mine). This time I used up some left over dyes and crappy cotton fabric I had - I am not too sure what I think of them. A couple of the smaller pieces I quite like but the orange an acqua pieces look a bit boring. I am thinking I might over dye them later to see what happens. I'll make sure to post before and after pictures shortly.
While I was out photographing the clothes line I though I would take a couple of pictures of the rest of the back yard. It is a beautiful time of the year being early autumn and as you can see the leaves are starting to fall. Maybe some inspiration can be found from these pictures.

Saturday, 8 March 2008

Printing on Fabric


It has been a couple of weeks since I put anything on this blog because of family commitments although I have been able to continue doing some things in the work room. These photos are not in the correct order but they do show my experiments with printing from glass. The third photo is actually the beginning of the process. It shows some squares of silk (of various types of silk) that I dyed with procion dyes. I used three colours, a green, violet and magenta and painted the dye on. I then joined them together on the sewing machine.


The first picture shows the piece after I mixed some acrylic paint (with textile medium) onto a glass plate and then placed the fabric on top of the plate allowing the paint to form a random pattern on the silk. I then left this to dry. The second picture shows the piece after I repeated this process with second and third colours randomly placed on the glass plate and each left to dry between colours


I really like the effect on fabric but it also works really well on the papers I make and tomorrow I will show pictures of my more recent paperart works.

Tuesday, 19 February 2008

What I did with Tree Bark - Felting


When I posted the picture of the tree bark I thought I really wanted to do something with the idea but I wanted to use completely different colours and I wanted to use felting as the technique with some hand embroidery. I felted pieces of hand dyed muslin (cheese cloth) into the wool top (bought already dyed), some had been machine embroidered before felting. Others were just the dyed fabric. i also cut up other pieces of pre felted muslin and embroidered them onto the completed piece of felting. The picture on the right shows pieces of felt I made that I then joined together to make one larger piece of felting. The left hand picture is the finished piece after I joined the pieces of felt together and then hand embroidered it with running stitches.

Monday, 18 February 2008

Embellished Felt and Machine Embroidery


This is a sample I have been experiementing with. I made a piece of felt with the embellisher and then I cut it up and placed some pieces between two pieces of gold netting and other pieces on top of the gold netting. After this I free machine embroidered on top. I showed it to Doreen of Creative Meanderings and she said I should show it on my blog so here it is. The first picture is the back of the work and the second more brightly coloured picture is the front. I don't think the pictures show the stitching very well . I am not sure what I will do with it yet, if anything.

Wednesday, 13 February 2008

Inspirations from Trees and Coffee

Coffee
I made myself an iced coffee on a very hot day a couple of weeks back. To make sure it was really cold I put the coffee in the glass in the freezer only to discover I left it too long and it started to freeze. After adding the milk it formed these lovely frozen pieces of coffee on top. I thought it was worth a picture and in fact I have been thinking about how to use it in some artwork.


Trees

Out working one day with the camera (a fairly rare event because I always to forget to take it)
I found these two trees with such wonderful bark that I couldn't resist a photo for inspiration.

Tuesday, 5 February 2008

Paper Arts - Picture to decorate a card front

This is a piece of cartridge paper on which I painted using water colour paints
This is the same piece of paper with nappy liner (it has been coloured using glitter shiva sticks) and then heated so it will adhere to the surface of the paper
This is the final piece after stamping, embossing and using the heat gun.
These are the products I used to enhance the surface

Felting and Dying

I have been experimenting with dying fabric - this is silk chiffon which I felted after the dying process was complete. I dyed the piece of fabric using the cramb jar method and only two dye colours - a basic yellow and magenta. After dying I used wool tops to felt it using the nuno felting method (although I did not leave any unfelted fabric as is often done). This piece of fabric was completely covered on the back with wool tops for felting and as a result the front surface is totally wrinkly as in nuno.
Cramb Jar Dying method
Place some dye at the bottom of a jar, place dry fabric on top and then drop the other colour on top of the fabric, or around the sides., depending on what you are trying to achieve. Cover gently with water. I also add soda ash water before leaving overnight.

Tuesday, 29 January 2008

More inspiration


This is another photo (of Grevillea Robusta) I have in my collection that can be used as inspiration for work. I am still waiting to discover what I can do with it. Next week I start concentrating on new work for the year so I am going see what I can do with it. Somehow mywork turns out different from what originally inspired me and I don't know what this says about me.

Friday, 25 January 2008

Squash in France


I took this pictures of pumpkins (squash) in France at the markets in Sarlat at the end of 2006. Aren't they colourful and interesting shapes. I want to use them as inspiration for future work but I am not sure what this will be yet. I am going to spend the next week or day letting them float in my mind till the inspiration arrives. Perhaps they will provide inspiration for you as well.

Thursday, 24 January 2008

More paper Art


This is another one of my paper art pictures. It was done by using the method described on 21 January ie. gesso, watercolour, paper serviettes sprayed walnut ink and goldfinger. Hope you like it.

Tuesday, 22 January 2008

Paper Art


One of my interests is creating papers that I use to create cards. Over the last few days I have made a few different ones - just for the fun of it. This is an example of one of these papers. It has been made by with a paper serviette glued on a painted gesso back ground. Then I stamped an image on top and embossed that with embossing powder. As you can see because of the uneven surface the stamp image was not precise and this was the effect I was looking for. I just wanted to highlight the flower without covering it over.
My general technique is to use watercolour paper which I cover with gesso - back and front and leave to dry. Then I use either acrylic paint or watercolour and paint over the gesso - any colour or combination of colours and leave to dry again. Then I use drop paint onto the base colour (or you can put dip your stamps into acrylic paints and leave a series of marks (or any kind or description) and leave this to dry. From this point on you can stamp with pigment inks, or glue serviettes onto the surface. You can emboss where you have stamped or spray walnut ink over the surface or any combination of these.

Finally you can use gold finger or treasure gold to highlight surface uneveness to give it life .

\